Audio Mixer Guide
This post and video provides an in-depth guide to setting up and operating the Fairhaven audio mixer, designed to accompany our detailed video tutorial. It covers everything from basic setup to advanced features, ensuring you can maximize the use of the audio mixer for your events.
Introduction
This post and video provides an in-depth guide to setting up and operating the Fairhaven audio mixer, designed to accompany our detailed video tutorial. It covers everything from basic setup to advanced features, ensuring you can maximize the use of the audio mixer for your events.
Getting Started
Powering On
- Amplifier: Locate the power button on the left-hand side. Make sure it's turned on before starting your setup.
- Mixer: The power switch is located near the power cord input. Flip the switch up to turn on the mixer.
Basic Connections
- The mixer accommodates various input types, including six XLR inputs for microphones, two stereo quarter-inch inputs for instruments, and RCA inputs for auxiliary devices.
Mixer Overview
Inputs and Outputs
- XLR Inputs: Primarily for microphones. Provides balanced connections to minimize noise.
- Stereo Quarter-Inch Inputs: For connecting keyboards, drum machines, or other stereo instruments.
- RCA Inputs: Ideal for connecting MP3 players, mobile devices, or other line-level sources.
Power Switch
- Located at the back. Ensure the switch is in the 'On' position for operation.
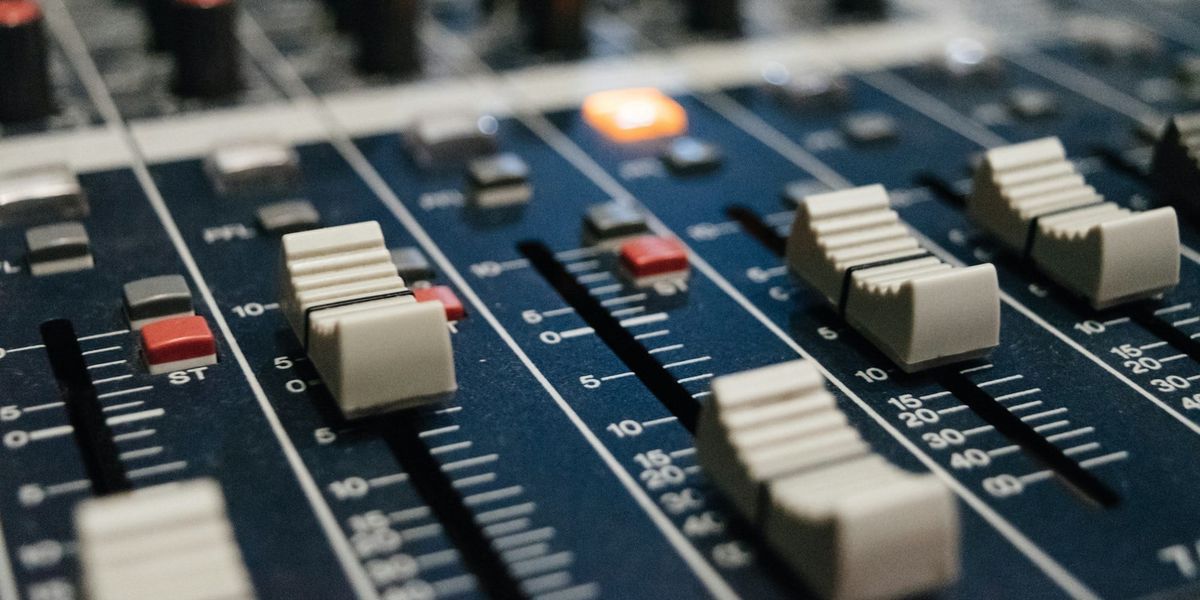
Channel Features
Faders and Volume Control
- Each channel has a fader for adjusting volume. Setting these to zero aligns with optimal loudness without risking feedback.
Mute/On Button
- This button acts as a mute; lit means the channel is active, unlit means muted.
Equalization (EQ)
- High, mid, and low knobs allow for tone shaping. Adjust these to enhance clarity or reduce feedback.
Compressors
- One-knob compressors help even out the dynamic range, particularly useful for vocal mics.
Gain
- Controls the sensitivity of each channel. Adjust this based on the loudness of the source.
Special Functions
Phantom Power
- Essential for condenser microphones. Activate this to power such mics.
USB Connectivity
- Allows direct recording to a computer and playback from the computer through the mixer.
Operation
Setting Up a Microphone
- Gain Setting: Use the PFL (Pre Fader Listen) to accurately set the gain for each microphone, ensuring optimal input levels.
- Volume Adjustment: Use the channel fader to adjust the volume. Aim for a setting where the voice is clear and present without causing feedback.
- EQ and Compression: Fine-tune the sound using EQ knobs and compression to suit the speaker or performer.
Troubleshooting and Tips
- Check bus buttons if experiencing issues with sound routing. Ensure channels are assigned to the correct output.
Locking the Mixer
- Utilize the locking feature to prevent unauthorized adjustments, using the default code 0101.
References
- For detailed technical specifications and advanced operational instructions, consult the Yamaha Mixer MG12XU and Yamaha Amp PA2030A manuals.